-
Whatsapp: +86 13526572721
-
Email: info@zydiamondtools.com
-
Address: AUX Industrial Park, Zhengzhou City, Henan Province, China
-
Whatsapp: +86 13526572721
-
Email: info@zydiamondtools.com
-
Address: AUX Industrial Park, Zhengzhou City, Henan Province, China

Master Diamond Wheel Dressing: Your Practical How-To Guide
Wondering how to properly maintain your diamond grinding wheels to keep them cutting effectively?
Mastering diamond wheel dressing—the professional method for cleaning and restoring your wheel’s sharpness—involves understanding why it’s crucial (restoring sharpness, removing loading), knowing when to do it (recognizing dullness, inefficiency), choosing the right tools (sticks, rotary dressers), performing the process safely and correctly, adapting techniques for different wheel types (resin, metal, vitrified), and avoiding common mistakes (wrong pressure, tools, inconsistency).
Why is Dressing Your Diamond Wheel Crucial?
So, why exactly is keeping your diamond grinding wheel dressed such an important task in precision grinding?
Dressing a diamond grinding wheel is crucial because it restores the wheel’s cutting ability by exposing fresh diamond particles, removes clogged materials (known as loading and glazing) to clean the wheel surface, and helps maintain the wheel’s correct shape for precise grinding results.
Restoring Cutting Performance
Think of a diamond grinding wheel like a very specialized piece of sandpaper. Tiny, super-hard diamond particles stick out from a bonding material, and these sharp points do the grinding work. However, over time and with use, a couple of things happen. The sharp points of the diamonds can become slightly rounded or flattened, making them less effective at cutting. Furthermore, the bonding material holding the diamonds can sometimes wear down slowly, but not always fast enough to expose new, sharp diamond edges underneath.
Dressing the wheel essentially gives it a refresh. The dressing tool acts to carefully break away a tiny layer of the bonding material and any dulled diamond particles. Consequently, this process reveals the next layer of sharp, fresh diamond points that were previously hidden within the bond. It’s somewhat like sharpening a pencil – you remove the wood to expose the fresh graphite lead. Restoring this cutting performance is vital because a sharp wheel cuts faster, cooler, and requires less pressure, ultimately leading to better productivity and less stress on both the machine and the workpiece. A dull wheel, conversely, can generate excessive heat, potentially damaging sensitive materials like carbide or ceramics.
Cleaning the Wheel Face: Removing Loading and Glazing
Beyond just dulling, the surface of a diamond wheel can become clogged or smoothed over in two main ways: loading and glazing. Understanding these is key to knowing why dressing is so necessary.
What is Loading?
Loading occurs when small chips of the material being ground get physically stuck in the spaces between the diamond abrasive grains. This often happens when grinding softer or gummier materials like aluminum or certain steels. Imagine trying to sand sticky wood – the sawdust quickly clogs the sandpaper, right? Similarly, these trapped metal particles prevent the sharp diamonds from making proper contact with the workpiece. This significantly reduces cutting action and can lead to poor surface finish and increased grinding temperatures.
What is Glazing?
Glazing is a bit different. It happens when the diamond particles themselves become flattened or worn down, and the surrounding bond material gets smeared over these dull points. This creates a smooth, glassy appearance on the wheel’s surface. Glazing often occurs when grinding very hard materials or using incorrect grinding parameters (like too slow a feed rate or too hard a wheel grade for the job). A glazed wheel loses its “bite” almost entirely; it tends to rub rather than cut, generating a lot of heat and potentially causing burn marks or metallurgical damage to the workpiece.
Dressing effectively tackles both problems. The abrasive action of the dressing tool physically dislodges the trapped particles (de-loading) and breaks away the smeared bond material and dull diamonds (removing glazing). This re-opens the wheel face, allowing coolant to reach the cutting zone more effectively and ensuring the sharp diamond points can engage cleanly with the workpiece material. Without regular dressing to combat loading and glazing, grinding quality will inevitably suffer.
Maintaining Wheel Geometry (Brief Overview)
While the primary goal of dressing is often seen as restoring sharpness and cleaning the wheel face, it also plays a role in maintaining the wheel’s shape, or geometry. As a wheel grinds, it doesn’t always wear perfectly evenly across its surface. Certain areas might wear down faster than others, leading to the wheel becoming out-of-round, tapered, or losing a specific profile that was intentionally shaped onto it for form grinding.
Though a separate process called “truing”1 is specifically dedicated to precisely restoring the wheel’s intended geometry, the act of dressing inherently helps. By removing a small, controlled layer from the wheel face during dressing, you are also incidentally removing some of the high spots and contributing to a more consistent shape. Think of it like ensuring a car tire wears evenly; consistent contact is crucial for performance. For high-precision grinding tasks, maintaining the correct wheel geometry is absolutely essential to achieve accurate dimensions and shapes on the finished part. Even minor deviations in the wheel’s shape can translate directly into errors on the workpiece. Therefore, while not its main function, the geometric upkeep provided by regular dressing is another significant reason why this process is indispensable.
When Does Your Diamond Wheel Need Dressing (or Cleaning)?
Okay, knowing dressing is important is one thing, but how can you tell exactly when your diamond wheel needs this attention?
You know your diamond wheel needs dressing when you observe clear signs of dullness like increased grinding noise or workpiece burn, notice a significant decrease in cutting efficiency requiring more pressure or time, or see visible buildup (loading) of material on the wheel’s surface.
Learning to spot these signals early is key to maintaining efficient and high-quality grinding operations. Let’s look at each indicator more closely.
Recognizing Signs of Dullness
When a diamond wheel loses its sharpness, it doesn’t always look obviously worn out, but its behavior changes. You need to pay attention to the grinding process itself. Here are common signs of dullness:
- Increased Grinding Noise: Does the grinding process sound different? A sharp wheel typically cuts relatively quietly and smoothly. Conversely, a dull or glazed wheel tends to rub and plow through the material, often resulting in a louder, higher-pitched screeching or whining sound. Any noticeable change in the operating sound can be a cue.
- Workpiece Burn or Discoloration: This is a very common and important indicator. Because a dull wheel creates more friction and heat instead of efficient cutting, the workpiece surface can overheat. On steel parts, this often shows up as blue, brown, or straw-colored burn marks. On heat-sensitive materials like advanced ceramics or carbide, thermal damage might not be as colorful but can still compromise the part’s integrity. Seeing any burn marks is a strong signal to stop and dress the wheel.
- Poor Surface Finish: Is the finish on your ground part not as smooth as it should be? A dull wheel can leave behind a rougher surface, visible scratch patterns, or even chatter marks (a pattern of tiny ridges or waves). If the surface quality suddenly degrades, wheel dullness is a likely culprit.
Observing Decreased Cutting Efficiency
Sometimes, the most obvious sign is simply that the grinding process isn’t working as well as it used to. This decrease in efficiency can manifest in several ways:
- Longer Grinding Times: If completing a standard grinding pass or removing a specific amount of material starts taking noticeably longer than usual, your wheel has likely lost its cutting edge. For shops tracking production metrics, this increase in cycle time is a clear flag.
- Need for Increased Pressure or Feed Force: Do you find yourself needing to push the workpiece harder into the wheel, or does the machine require a higher feed rate setting just to make the wheel cut effectively? When the diamond points are dull, more force is needed to penetrate the workpiece material. This not only slows down the process but also puts extra strain on the grinding machine’s spindle and feed mechanisms.
- Difficulty Holding Size: A dull wheel can sometimes deflect more or struggle to remove material consistently, making it harder to grind parts to the required precise dimensions (holding tolerance). If you suddenly find it challenging to hit your target size accurately, a dull wheel could be the reason.
Identifying Visible Wheel Loading
As discussed previously, loading is when particles from the material being ground get stuck on the wheel face. While dullness might be subtle, loading can often be seen directly on the wheel.
- Look for Shiny Spots: Carefully inspect the grinding surface of the diamond wheel (ensure the machine is safely stopped first!). Loading usually appears as shiny, metallic streaks or patches embedded within the typically duller texture of the wheel’s bond material. These spots reflect light differently than the rest of the wheel face.
- Check After Grinding: Loading is often most apparent right after a grinding pass, before coolant fully washes the surface or the wheel sits idle for long. Good lighting is essential for this visual inspection.
- Consider the Material: Remember, loading is particularly common when grinding softer, non-ferrous metals like aluminum or copper, but it can certainly happen with steels and other alloys too, especially if grinding parameters aren’t optimized. If you’re grinding materials known for causing loading, visually inspect the wheel frequently. Does your wheel look more like a smooth metal disc than an abrasive tool in some spots? That’s likely loading.
Paying attention to these auditory, visual, and performance-based clues will help you determine the right time to dress your diamond wheel, ensuring consistent results and preventing potential damage to your workpiece or machine.
What Tools Are Required for Effective Dressing?
Now that you know why and when to dress your wheel, what exactly do you use to perform this important maintenance task?
Effective dressing typically requires tools like abrasive dressing sticks or blocks, commonly made of silicon carbide or aluminum oxide, or more advanced rotary dressers which can be powered or non-powered diamond tools, with the best choice depending on the wheel type, machine setup, and desired outcome.
Choosing the correct tool is essential for dressing your diamond wheel efficiently without causing damage. Let’s explore the common options.
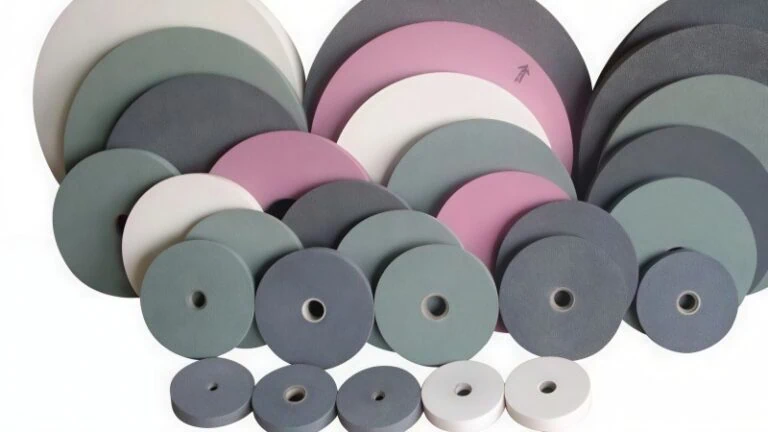
Common Dressing Sticks and Blocks
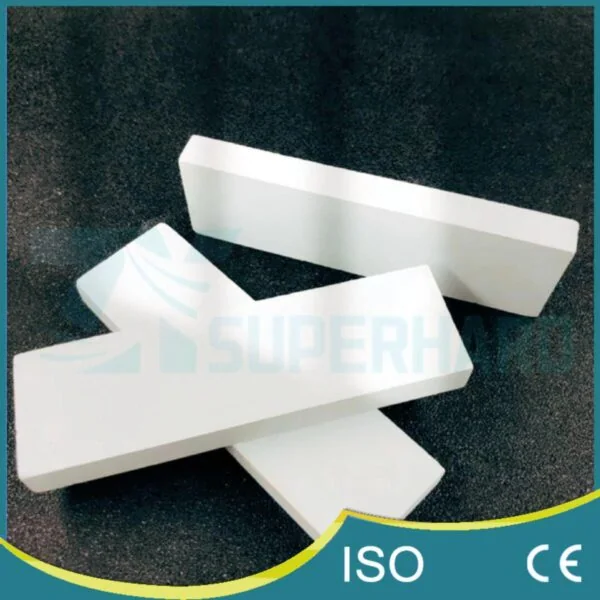
Perhaps the simplest and most widely used dressing tools, especially for certain applications, are sticks and blocks.
What They Are: These are typically rectangular sticks or blocks made from conventional abrasive materials. They can be held by hand (with extreme care and proper technique ensuring safety) or mounted in a fixture on the grinding machine.
Materials: Dressing sticks suitable for diamond wheels commonly use conventional abrasives. White Aluminum Oxide (WA), typically white in color, is frequently recommended, especially for resin bond wheels, due to its effective yet relatively gentle dressing action that helps expose new diamond particles without excessive bond erosion. Silicon Carbide (SiC), often black or green, is also used; being harder, it may be selected for specific applications requiring a more aggressive dressing effect or when dressing certain types of conventional (non-diamond) wheels.
How They Work: When held firmly against the rotating diamond wheel, the abrasive grains in the stick wear away the bond material of the grinding wheel. This action exposes fresh diamond particles and removes loading (accumulated workpiece material) or glazing (dulled wheel surface).
Grit Size Matters: Dressing sticks come in various grit sizes (coarseness levels). Selecting the appropriate grit is crucial, as using the wrong size can be ineffective or potentially damage the wheel. While the ideal grit often relates to the diamond wheel being dressed, specific recommendations depend heavily on the wheel’s bond type, diamond concentration, application, and the desired wheel surface condition after dressing. Therefore, it’s always wise to consult your tool supplier or the wheel manufacturer to confirm the appropriate dressing stick grit for your specific diamond wheel.
Best For: Sticks and blocks provide a practical and economical solution for many dressing tasks, proving especially effective on resin bond diamond wheels. For this common application, White Aluminum Oxide (WA) types, like these WA dressing sticks2, are often preferred due to their gentle yet efficient action. They are suitable for manual grinding operations or quick touch-ups where simplicity and cost are factors.
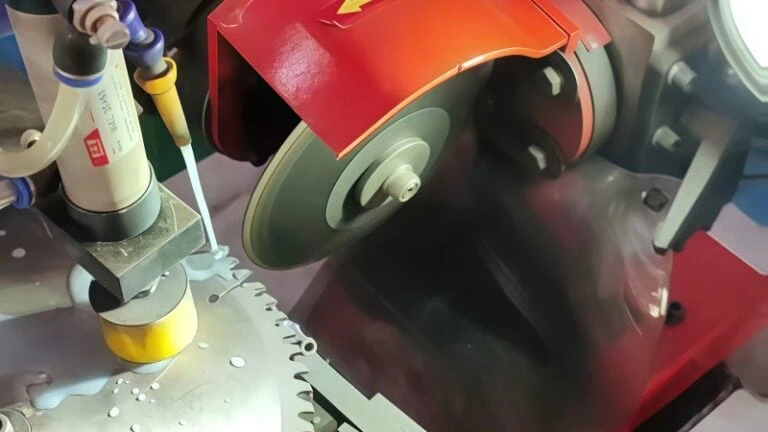
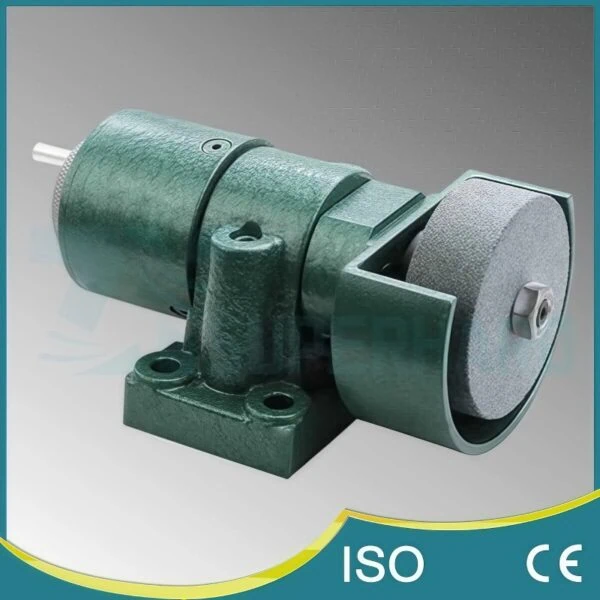
Understanding Rotary Dressers
For more automated, precise, or heavy-duty dressing, rotary dressers are often employed.
- What They Are: Instead of a static block, these tools feature a rotating head or wheel that dresses the grinding wheel. They are usually mounted securely onto the grinding machine and can be either driven by their own motor or rotated by contact with the grinding wheel itself.
- Common Types:
- Impregnated Diamond Rotary Dressers: These look like small grinding wheels themselves, containing diamond particles embedded within a metal or resin bond matrix. They are very effective at dressing harder bond diamond wheels (metal, vitrified) and also CBN (cubic boron nitride) wheels.
- Form Rolls / Profiled Dressers: These specialized rotary dressers have a specific shape ground onto their surface. When used, they transfer this shape onto the grinding wheel, allowing for precise form grinding. These are common in high-volume production environments.
- Brake-Controlled Dressers: This is a type of non-powered rotary dresser. Applying a brake mechanism creates a speed difference between the dresser and the grinding wheel, which enhances the dressing action for certain applications.
- Advantages: Rotary dressers often provide a more consistent, controlled dressing action compared to manual stick dressing. They can be integrated into automated CNC grinding cycles, improving efficiency and repeatability in production settings.
Selecting the Right Tool for Your Wheel
So, how do you choose between a simple stick and a more complex rotary dresser? Several factors come into play:
- Diamond Wheel Bond Type: This is often the most critical factor.
- Resin Bond: Frequently dressed well with Silicon Carbide (SiC) sticks/blocks, especially for faster opening, although White Aluminum Oxide (WA) sticks/blocks are often recommended for a gentler action. Some specialized rotary dressers can also be used.
- Metal Bond: These durable wheels usually require a more aggressive dressing action. Impregnated diamond rotary dressers or specially formulated hard abrasive blocks might also work. Standard SiC sticks may be less effective.
- Vitrified Bond: These wheels can be dressed with specific dressing sticks or, more commonly in production, with impregnated diamond rotary dressers.
- Machine & Application:
- Manual grinders often rely on sticks due to simplicity and cost.
- CNC grinding machines frequently incorporate automated rotary dressing systems for consistency and unattended operation.
- The need for high precision or form grinding often points towards rotary dressers.
- Desired Outcome:
- A quick clean-up or minor sharpening might be fine with a stick.
- Achieving optimal wheel condition for high-precision work or long production runs might necessitate a rotary dresser.
- Budget: Dressing sticks and blocks are significantly more affordable upfront compared to rotary dressing systems, which involve higher initial investment but can offer long-term benefits in automated environments.
Ultimately, the best approach is often to consult the documentation provided by your diamond wheel manufacturer. They typically offer specific recommendations for the most suitable dressing tools and parameters for their products. Don’t hesitate to also seek advice from your abrasive tool supplier based on your specific wheel, machine, and application.
How Do You Perform the Dressing Process Safely and Effectively?
Alright, you know why, when, and what tools to use – so how do you actually go about dressing the diamond wheel safely and correctly?
Performing diamond wheel dressing safely and effectively involves prioritizing safety precautions like wearing PPE, preparing the machine by ensuring stability and proper coolant flow, applying the dressing tool correctly with appropriate pressure and feed rate, following specific steps for either stick or rotary dressing, and finally inspecting the wheel surface.
Following a structured process ensures not only your safety but also the best results for your diamond wheel’s performance. Let’s break down these crucial steps.
Prioritizing Safety: Essential Precautions
First and foremost, safety cannot be overstated when working with grinding machines. Dressing generates dust and debris, and rotating machinery always carries risks. Always adhere to these precautions:
- Personal Protective Equipment (PPE): This is non-negotiable.
- Eye Protection: Wear safety glasses that meet relevant safety standards (e.g., ANSI Z87.1)3. Consider adding a full face shield over glasses for maximum protection from flying particles, especially during manual dressing.
- Hand Protection: Use appropriate gloves to protect against abrasion or sharp edges.
- Respiratory Protection: Wear a dust mask or respirator suitable for the type of dust generated, particularly important when dressing dry.
- Hearing Protection: Grinding operations can be loud; use earplugs or earmuffs.
- Machine Guarding4: Ensure all wheel guards and machine enclosures are securely in place and functioning correctly before starting. Never operate the machine with guards removed or bypassed.
- Secure Mounting: Double-check that the grinding wheel itself is properly mounted and that the dressing tool (especially if fixtured) is clamped rigidly and securely.
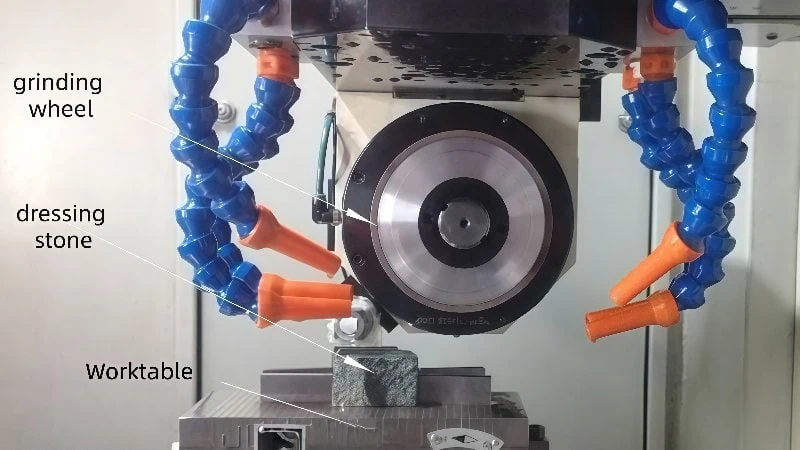
Preparing the Grinding Machine
Before you begin dressing, take a moment to prepare the machine and work area:
- Clean Area: Ensure the machine table and the area around the grinding wheel are clean and free from tools, rags, or other obstructions.
- Wheel Inspection: Perform a quick visual check of the diamond wheel. Look for any obvious cracks or damage. Never use a wheel that appears damaged.
- Coolant System (Wet Dressing): If you are dressing wet (which is often recommended to control dust and heat), verify that the coolant nozzles are positioned correctly to flood the dressing zone and that the flow rate is adequate. Proper coolant application flushes away debris effectively.
- Machine Stability: Confirm the grinder is stable and that any fixture holding the dressing tool is mounted rigidly to prevent vibration during the process.
Applying the Dressing Tool Correctly
How you bring the dressing tool into contact with the wheel significantly impacts the result:
- Positioning:
- Dressing Sticks/Blocks: If fixtured, ensure precise alignment. If applying by hand (requires significant experience and caution), hold the stick firmly, brace it securely against a work rest, and present it squarely or at a slight appropriate angle to the wheel face. Never hold a dressing stick loosely or unsupported near the rotating wheel.
- Rotary Dressers: Mount according to the manufacturer’s instructions, ensuring correct alignment (e.g., parallelism or angle relative to the wheel spindle).
- Pressure / Infeed: Apply steady, consistent force when using a stick. For rotary dressers, use a controlled infeed rate (how fast the dresser moves into the wheel). Avoid banging the tool into the wheel or applying excessive force, which can damage both the wheel and the dresser. The ideal pressure or infeed depth depends heavily on the specific wheel, dressing tool, and machine conditions. Always start with conservative settings recommended by the manufacturer or supplier and adjust cautiously based on results.
- Traverse Speed: Move the dressing tool across the face of the grinding wheel (or traverse the wheel across the tool) at a steady, consistent speed. Moving too quickly might not dress the wheel effectively, while moving too slowly could potentially glaze the wheel or the dresser. Consult supplier or manufacturer documentation for recommended traverse speeds for your specific setup, as this can vary significantly.
- Coolant: In wet dressing, ensure coolant is directed precisely at the point of contact throughout the dressing pass.
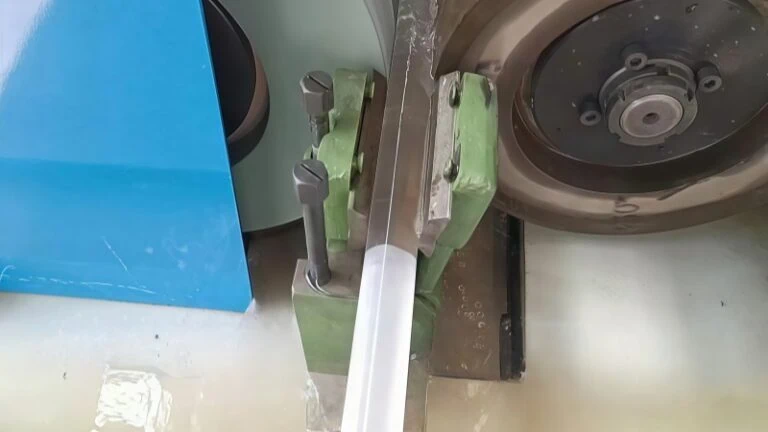
Step-by-Step Dressing Technique (Stick/Block)
Here is a typical sequence for dressing with a stick or block:
- Safety & Prep: Double-check all safety precautions (H3.1) and machine preparations (H3.2).
- Start Wheel: Turn on the grinding machine spindle to its normal operating speed.
- Start Coolant: If dressing wet, ensure coolant is flowing correctly.
- Position Stick: Securely mount the stick in its fixture or, if hand-dressing (use extreme caution), grip firmly and brace properly on a tool rest.
- Engage Gently: Carefully bring the dressing stick into contact with the rotating wheel face.
- Apply Pressure: Apply firm, even pressure against the wheel.
- Traverse Smoothly: Move the stick steadily across the entire width of the wheel face. Ensure you cover the full surface needing dressing. Repeat the traverse motion as necessary.
- Monitor: Listen to the sound – it often changes as the wheel cleans up. Observe the spark stream or coolant slurry for consistency.
- Disengage: When the wheel appears dressed (uniform texture/sound), carefully withdraw the stick from contact.
- Shutdown: Turn off the coolant flow first, then stop the grinding wheel spindle.
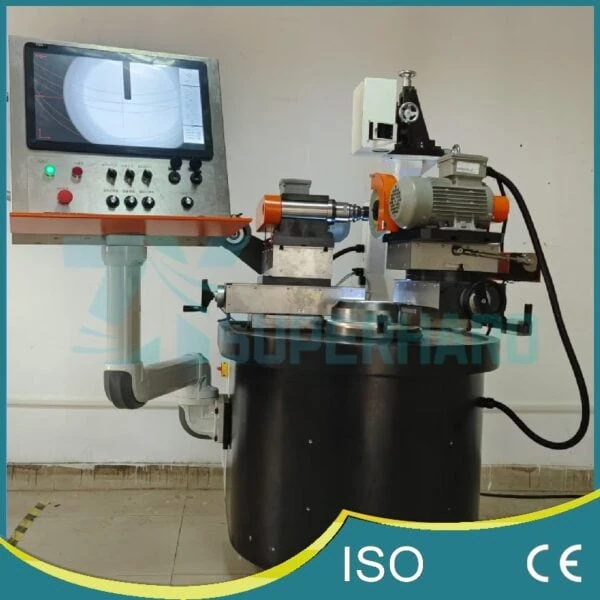
Step-by-Step Dressing Technique (Rotary – if applicable)
Dressing with a rotary tool often involves more machine controls:
- Safety & Prep: Confirm safety measures (H3.1) and machine readiness (H3.2). Ensure the rotary dresser is correctly installed, aligned, and ready.
- Start Spindles/Coolant: Start the grinding wheel spindle. Turn on coolant if applicable. Start the rotary dresser spindle if it’s powered, or ensure the brake mechanism is ready if using a brake-type dresser.
- Approach & Infeed: Carefully feed the rotary dresser towards the grinding wheel using the machine controls. Apply the recommended initial depth of cut (infeed). Refer to your specific machine and rotary dresser manuals for recommended approach speeds and infeed values, as these are critical parameters.
- Traverse: Engage the machine’s traverse function to move the dresser across the wheel face (or vice-versa) at the specified speed. Ensure proper overlap between passes if multiple traverses are needed.
- Monitor Process: Observe the machine’s load meter (if available), listen for consistent sound, and watch the interaction.
- Complete Passes: Perform the required number of dressing passes or reach the target dressing depth according to the established procedure or manufacturer guidelines.
- Retract: Once dressing is complete, carefully retract the rotary dresser clear of the grinding wheel using machine controls.
- Shutdown: Stop the rotary dresser (spindle or brake), turn off coolant, and finally stop the grinding wheel spindle.
Inspecting the Wheel Post-Dressing
After dressing and ensuring the wheel has come to a complete stop:
- Visual Check: Carefully examine the wheel surface under good lighting. It should have a uniform, open texture. Look for any remaining shiny spots (loading/glazing) or unevenness. The goal is a consistently clean and sharp-looking surface across the entire wheel face.
- Feel (Use Caution): Experienced operators might very carefully touch the stopped wheel surface to feel for sharpness and consistency. However, a thorough visual inspection is generally safer and sufficient.
- Test Grind: The best confirmation is often a brief test grind on a piece of scrap material. This allows you to check if the cutting action feels right, the sound is normal, and the resulting surface finish is as expected. This confirms the dressing was successful.

Are Dressing Techniques Different for Various Wheel Types?
We’ve talked about dressing, but does the type of diamond wheel you’re using change how you should approach dressing it?
Yes, dressing techniques and tool choices often differ significantly based on the diamond wheel’s bond type – primarily Resin, Metal, or Vitrified – because each bond material has unique hardness and wear characteristics that dictate the most effective dressing approach.
Understanding these differences is vital for choosing the right tools and methods to keep your specific diamond wheels performing at their best.
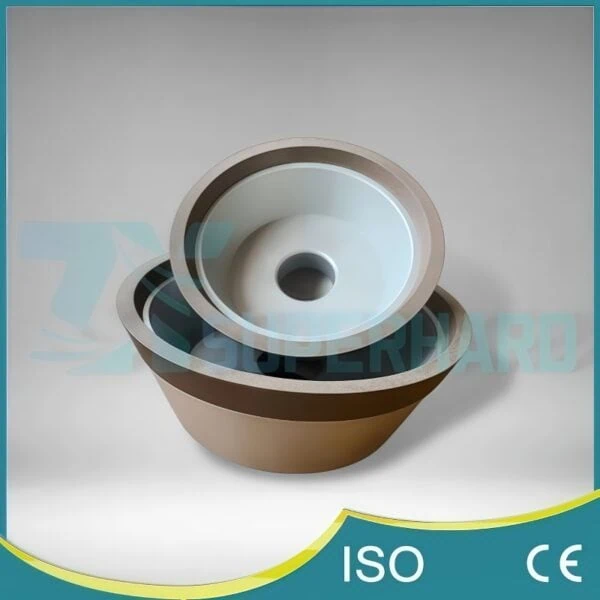
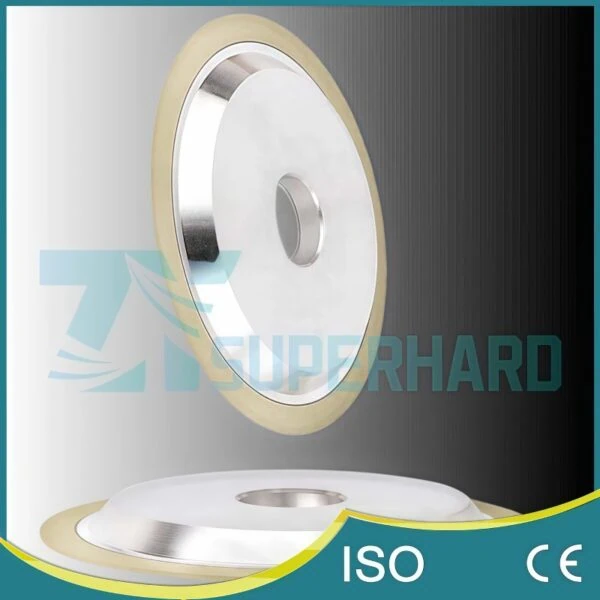
Considerations for Resin Bond Wheels
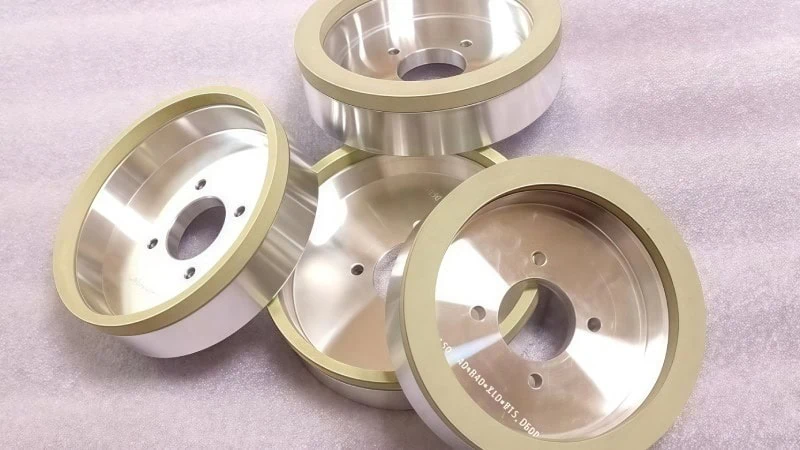
Resin bond wheels5 are very common, especially for grinding materials like tungsten carbide6 and ceramics. Their characteristics influence how they should be dressed:
- Bond Properties: Resin bonds are generally the softest of the three main types. They are designed to wear away relatively easily during grinding, constantly exposing fresh, sharp diamond particles. This makes them “free-cutting.”
- Dressing Needs: Because the bond wears readily, dressing is often focused on cleaning away loading (stuck material) and gently eroding the bond surface just enough to ensure sharp diamonds are exposed. They are less prone to severe glazing than harder bonds.
- Common Tools: As mentioned earlier, standard silicon carbide (SiC) dressing sticks are typically very effective for resin bond wheels. The SiC abrasive is hard enough to wear away the resin bond without being overly aggressive.
- Technique Notes: Generally, dressing requires less force or pressure compared to metal or vitrified bonds. The goal is a quick clean-up rather than significant material removal from the wheel itself. Overly aggressive dressing can shorten the wheel’s lifespan unnecessarily. However, specific pressures and speeds still depend on the exact wheel formulation and application, so always check the manufacturer’s guidelines.
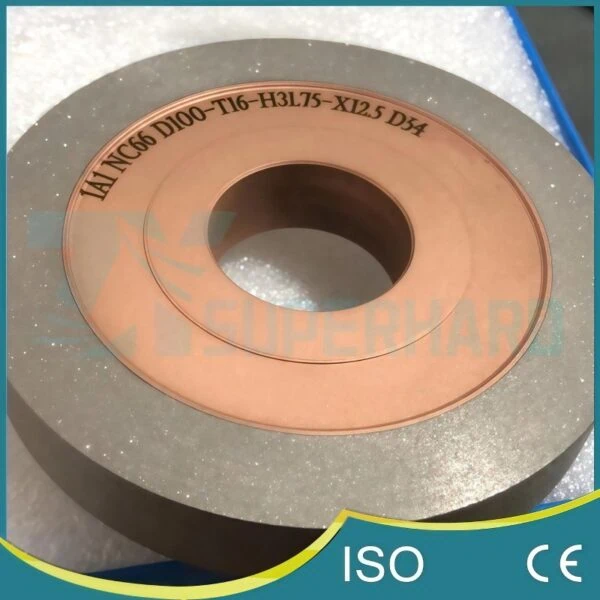
Considerations for Metal Bond Wheels
Metal bond wheels7 are known for their exceptional durability and ability to hold complex shapes. This toughness presents unique dressing challenges:
- Bond Properties: These bonds use metals (like bronze, steel, or other alloys) to hold the diamonds. They are extremely hard and wear-resistant. This is great for wheel life but makes exposing new diamonds difficult.
- Dressing Needs: Dressing metal bond wheels requires significant force to physically break down the tough bond material. These wheels are more prone to glazing if not dressed properly because the diamonds get worn flat, and the bond doesn’t erode easily to expose new ones. Simply cleaning isn’t enough; the bond must be eroded.
- Common Tools: Standard SiC dressing sticks are often completely ineffective. Effective dressing usually demands more powerful tools like impregnated diamond rotary dressers or potentially very hard, specialized abrasive blocks designed specifically for metal bonds.
- Technique Notes: Expect to use higher dressing forces, deeper infeeds (with rotary dressers), and often slower traverse speeds to give the dressing tool enough time and force to fracture the metal bond. Insufficient force will fail to open the wheel’s structure. Trying to scrub a very hard, smooth surface vs. a softer one – you need more force and a tougher scrubber for the hard surface. Using the correct, often more aggressive, dressing tool and parameters recommended by your supplier is crucial for these durable wheels.
Considerations for Vitrified Bond Wheels
Vitrified bonds, essentially a glassy or ceramic matrix, offer a balance of hardness, porosity (good for coolant flow and chip clearance), and cutting ability. They are increasingly used for grinding various steels, alloys, and superabrasive materials.
- Bond Properties: Vitrified bonds are hard and brittle. They hold the diamonds rigidly but can be chipped or fractured if subjected to excessive shock or improper dressing forces.
- Dressing Needs: Dressing needs to be carefully controlled to achieve a “controlled fracture” of the brittle bond, exposing fresh diamonds without causing large-scale damage to the wheel structure. They can be susceptible to both loading and glazing.
- Common Tools: Impregnated diamond rotary dressers are frequently the preferred method as they offer precise control over the dressing process. While some specialized vitrified dressing sticks exist, standard SiC sticks might wear down too quickly or not provide the optimal result compared to rotary dressing.
- Technique Notes: Precision is key. Dressing parameters like speed, feed, and pressure must be carefully managed according to the specific wheel’s formulation. The goal is consistent micro-fracturing of the bond. Vitrified bonds can vary considerably in their composition, so it’s essential to use the dressing method and parameters specified by the wheel manufacturer to avoid damaging the wheel and ensure optimal grinding performance.
In summary, always consider the bond type of your diamond wheel when planning your dressing strategy. Matching the dressing tool and technique to the bond’s characteristics is fundamental for success.

What Common Dressing Mistakes Should You Avoid?
Knowing how to dress your wheel is great, but what common pitfalls should you actively try to avoid during the process to ensure success?
Common dressing mistakes to avoid include applying incorrect pressure (too much or too little), using the wrong type or grit of dressing tool for the wheel bond, neglecting proper cleaning of the wheel and machine area, and applying the dresser inconsistently across the wheel face.
Steering clear of these errors will help you maintain wheel performance, extend wheel life, and ensure safe operation. Let’s examine each mistake more closely.
Applying Excessive or Insufficient Pressure
Finding the right amount of force when applying the dressing tool is critical. Getting it wrong can lead to problems:
- Excessive Pressure (Too Much Force): Pushing too hard with the dressing tool, whether it’s a stick or a rotary dresser with too deep an infeed, is counterproductive.
- Consequences: This can severely damage the diamond wheel by stripping out diamond particles prematurely, excessively eroding the bond material, or even cracking brittle vitrified bonds. It drastically shortens the wheel’s useful life. Furthermore, it causes rapid wear on the dressing tool itself and can generate dangerous amounts of heat. If hand-dressing with a stick, too much force also increases the risk of the stick catching and causing an accident. Like pressing way too hard with sandpaper – you tear it up quickly and might gouge the wood.
- Insufficient Pressure (Too Little Force): Being too timid with the dresser is also ineffective.
- Consequences: If you don’t apply enough force, the dresser won’t effectively remove loading or glazing, nor will it properly erode the bond to expose fresh diamond points. In some cases, light pressure can actually worsen glazing on both the grinding wheel and the dressing tool, making them both smooth and unable to cut. Essentially, you waste time without achieving the desired result.
Finding that ‘just right’ amount of pressure or infeed often comes with experience, but referencing supplier recommendations for starting parameters based on your wheel and tool is crucial.
Using an Inappropriate Dressing Tool
As we discussed earlier, different diamond wheels require different dressing tools. Using the wrong one is a frequent mistake.
- Tool Too Soft or Wrong Grit: Trying to dress a tough metal bond wheel with a standard silicon carbide stick meant for resin bonds, for example, simply won’t work well.
- Consequences: The dressing tool will likely wear down very quickly without effectively dressing the wheel. The wheel may remain loaded or become glazed, leading to poor grinding performance.
- Tool Too Aggressive: Conversely, using a dressing tool that’s too hard or coarse for the wheel can be destructive. For instance, using a very aggressive rotary diamond dresser designed for metal bonds on a softer resin bond wheel.
- Consequences: This can rip diamonds out, severely damage the bond structure (especially brittle vitrified bonds), and dramatically reduce wheel life. It’s like using extremely coarse sandpaper on a delicate finish – you’ll cause more harm than good.
- Wrong Tool Type for the Job: Attempting intricate form dressing with a simple flat stick, or using only a stick when an automated rotary dresser is needed for production consistency.
Remember, matching the dressing tool (its material, grit, and type) specifically to the diamond wheel’s bond type (Resin, Metal, Vitrified) and the grinding application is essential. When in doubt, consult the wheel manufacturer or your tooling supplier.
Neglecting Wheel and Machine Cleaning
Grinding and dressing are inherently messy processes. Failing to manage the debris can cause problems.
- Before Dressing: Starting with a wheel face already caked with old coolant residue and grinding swarf makes it harder for the dressing tool to work effectively. A clean start is always better.
- During & After Dressing: The dressing process itself generates particles of bond material, diamond fragments, and removed workpiece material.
- Consequences: If this debris isn’t effectively removed (by sufficient coolant flow in wet dressing or proper dust extraction in dry dressing), it can immediately re-contaminate the freshly dressed wheel, defeating the purpose. Furthermore, allowing this grit and sludge to build up in machine guards, coolant sumps, and around the work area can interfere with machine function, reduce coolant effectiveness over time, and potentially compromise future grinding operations.
Maintain good housekeeping. Ensure adequate coolant flow or dust extraction during dressing, and clean the wheel face and surrounding machine area afterward.
Inconsistent Dresser Application
How you move the dresser across the wheel face matters significantly. Inconsistency leads to poor results.
- Uneven Speed or Pressure: If you traverse the dressing stick too quickly in some areas and too slowly in others, or vary the pressure significantly during a manual pass:
- Consequences: You’ll end up with an unevenly dressed wheel face. Some sections might be properly opened, while others remain loaded, glazed, or are overly dressed. This leads directly to inconsistent grinding performance, poor surface finish, and difficulty holding size.
- Incomplete Coverage: Failing to move the dresser across the entire width of the wheel face that needs attention.
- Consequences: Any part of the wheel face left undressed will continue to perform poorly, negating the benefits of dressing the rest of the wheel. This often results in uneven wear and poor part quality.
Strive for smooth, steady motion and consistent pressure (or feed rate) during each dressing pass, ensuring you cover the entire required surface evenly. Proper machine setup and rigid tool fixturing greatly help achieve this consistency.
Conclusion
Properly dressing—the correct method for cleaning and sharpening your diamond grinding wheels—is not just maintenance; it’s essential for achieving precision, efficiency, and safety in your grinding operations. By understanding the why, when, and how, selecting the right tools, adapting to wheel types, and avoiding common errors as outlined in this guide, you can significantly extend wheel life and ensure consistent, high-quality results. Apply these practices consistently for optimal grinding performance.
References
- separate process called “truing”1 – ZYDiamondTools’ step-by-step guide on the process of truing a diamond grinding wheel to restore its geometric shape.
- WA dressing sticks2 – ZYDiamondTools product page for White Aluminum Oxide (WA) dressing sticks suitable for diamond wheels.
- relevant safety standards (e.g., ANSI Z87.1)3 – OSHA regulation covering eye and face protection standards in the workplace.
- Machine Guarding4 – OSHA regulation detailing guarding requirements for abrasive wheel machinery.
- Resin bond wheels5 – ZYDiamondTools comprehensive guide to mastering the selection and application of resin bond diamond/CBN grinding wheels.
- tungsten carbide6 – Encyclopedia Britannica entry describing tungsten carbide.
- Metal bond wheels7 – ZYDiamondTools general product category page for Metal Bond Diamond and CBN Grinding Wheels.