-
Whatsapp: +86 13526572721
-
Email: info@zydiamondtools.com
-
Address: AUX Industrial Park, Zhengzhou City, Henan Province, China
-
Whatsapp: +86 13526572721
-
Email: info@zydiamondtools.com
-
Address: AUX Industrial Park, Zhengzhou City, Henan Province, China

How Do You Solve Vibration, Chip Control, and Surface Finish Issues in PCD Grooving?

Are you trying to master PCD grooving but constantly run into frustrating issues with vibration, tangled chips, and poor surface quality?
Solving these core PCD grooving issues requires a systematic, three-pronged approach. First, you must eliminate vibration by maximizing system rigidity and optimizing your cutting parameters. Second, ensure smooth chip evacuation by using advanced chipbreaker geometries and high-pressure coolant. Finally, you can only achieve a flawless surface finish after solving the first two problems, carefully managing tool wear, and using a dedicated finishing pass.
What Are the Root Causes of Vibration and How Can You Eliminate It?
So, what is really causing that frustrating vibration during your PCD grooving operations?
Vibration, often called chatter, typically stems from a lack of system rigidity, incorrect cutting parameters, or a mismatch between the tool’s geometry and the application. To eliminate it, you must first increase the stiffness of your tool and holder setup, then systematically optimize cutting speeds and feeds to find a stable cutting window, and finally, ensure you are using a PCD tool with the correct geometry for the material and operation.
Vibration is more than just an annoying noise; it is a high-frequency shaking that ruins surface finish, drastically shortens the life of your expensive PCD tools, and can even damage your machine’s spindle. Think of it as an earthquake happening at the tip of your cutting tool. Let’s break down how to stop it.
Analyze Your Tooling and Holder Rigidity
Rigidity simply means how stiff and stable your entire cutting system is. Imagine trying to write your name with a long, flimsy rubber pencil. Your letters would be shaky and messy. Now, imagine using a short, solid metal rod; your writing would be precise and controlled. The same principle applies directly to machining.
Minimize Tool Overhang
Overhang is the distance the tool sticks out from the tool holder. This is the single biggest factor affecting rigidity. A longer overhang acts like a diving board, amplifying any small force into a large vibration.
- The Rule of Thumb: Always use the shortest possible tool overhang. A common industry principle states that doubling the overhang can increase vibration by up to eight times.
- Practical Example: In a case study involving grooving an aluminum engine block, reducing a PCD tool’s overhang from 60 mm to 30 mm decreased vibration amplitude by over 70%, completely eliminating chatter marks on the sidewall.
- Actionable Step: Before starting a job, measure the required groove depth and set your tool so it extends just slightly beyond that depth, leaving no unnecessary length exposed.
Choose a High-Performance Holder
The tool holder is the critical link between your machine and your PCD tool. Using a low-quality or worn-out holder is like putting cheap tires on a race car—it undermines the performance of the entire system.
| Holder Type | Rigidity | Damping Capability | Best Use Case |
|---|---|---|---|
| Standard ER Collet | Fair | Low | General purpose, less demanding jobs |
| Milling Chuck | Good | Moderate | Heavier roughing, good grip |
| Hydraulic Chuck | Excellent | High | Finishing, high-speed grooving, chatter-prone jobs |
| Shrink-Fit Holder | Excellent | Moderate | High-precision and high-RPM operations |
A hydraulic chuck, for instance, contains a pocket of oil that absorbs micro-vibrations, acting like a shock absorber to provide a much smoother cut than a standard collet chuck.
Optimize Cutting Speeds and Feeds
Your cutting parameters—specifically cutting speed (RPM) and feed rate—can either create a stable process or push the system into a state of violent chatter. Every tooling setup has a natural frequency, like a guitar string. If your cutting speed excites this frequency, vibration will occur.
- Finding the “Sweet Spot”: You often don’t need to slow down to stop chatter. Sometimes, increasing the speed can move you out of the unstable frequency zone. A systematic approach is best:
- Start with the parameters recommended by your tool supplier.
- If chatter occurs, try reducing the cutting speed by 10%.
- If that doesn’t work, return to the original speed and increase it by 10%.
- Adjust the feed rate independently to ensure proper chip formation without creating excessive cutting pressure.
Important Note: Optimal cutting parameters are highly dependent on the specific PCD grade, workpiece material, and machine rigidity. Always use the manufacturer’s recommendations as a starting point and be prepared to adjust. Verifying the suggested speed and feed range with your supplier is a crucial step for success.
Select the Correct PCD Tool Geometry
The shape and design of the PCD tool itself play a massive role in managing cutting forces, which are the source of vibration. Using the wrong geometry is like trying to chop down a tree with a butter knife—it creates resistance and instability.
Rake and Relief Angles
- Positive Rake Angle: This geometry presents a sharper edge to the material, effectively “shearing” it away. This reduces cutting forces, making it ideal for grooving soft, non-ferrous materials like standard aluminum alloys. Lower forces mean less potential for vibration.
- Neutral or Negative Rake Angle: This provides a stronger, more robust cutting edge. While it increases cutting forces, it’s necessary for tough materials like high-silicon aluminum or Metal Matrix Composites (MMCs) and for interrupted cuts where the tool edge could easily chip. To counteract the higher force, the rest of the system must be exceptionally rigid.
PCD Grain Size
PCD is not all the same1; it comes in different grain sizes, affecting its properties.
- Fine Grain PCD (e.g., 2-5 µm): Creates an extremely sharp cutting edge. This sharpness reduces cutting pressure and is perfect for finishing passes where surface quality is the priority and vibration must be minimized.
- Coarse Grain PCD (e.g., 25-30 µm): Offers superior toughness and abrasion resistance. It is the preferred choice for roughing operations or for cutting highly abrasive materials, where edge strength is more critical than minimizing cutting force.
Why Are Your Chips Clogging and How Do You Improve Evacuation?
Ever wondered why that narrow groove you’re cutting keeps packing up with a bird’s nest of metal chips?
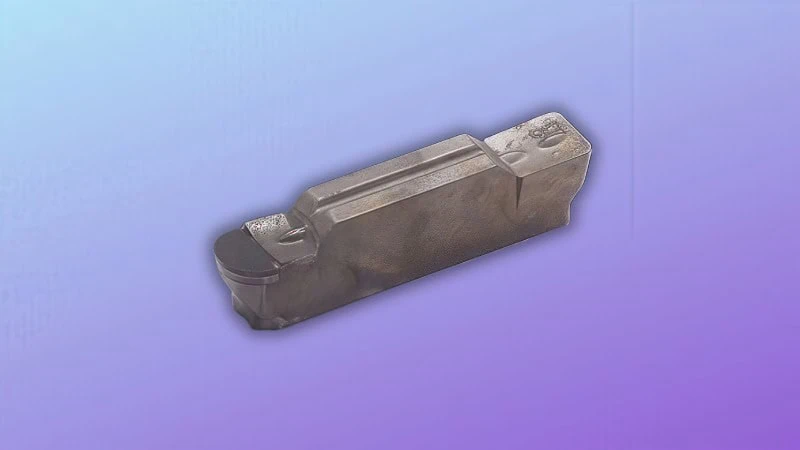
Chips clog your groove primarily because they aren’t breaking into small, manageable segments. This is often caused by incorrect tool geometry, insufficient coolant, or a cutting strategy that doesn’t allow chips to escape. To fix this, you must use a PCD tool with an effective chipbreaker, optimize your coolant delivery for high pressure and precise direction, and use programming techniques like peck grooving for deep cuts.
Poor chip evacuation isn’t just messy. When chips pack into a groove, they can be re-cut, which spikes cutting forces, damages the workpiece surface, and can quickly lead to the catastrophic failure of your PCD tool. Let’s dig into how to keep those chips flowing freely. 🌊
Implement Effective Chipbreaker Geometries
A chipbreaker is a small, specially designed geometry on the face of your cutting tool. Its purpose is to solve the problem of long, stringy chips, which often look like a continuous ribbon of wrapping paper. A well-designed chipbreaker2 forces this ribbon to curl tightly until it snaps into short, manageable pieces that can be easily washed away.
Molded vs. Laser-Cut Chipbreakers
Not all chipbreakers are created equal. The technology used to create them has a direct impact on their performance, especially in “gummy” materials like aluminum that tend to produce long, continuous chips.
- Molded or Ground-in Chipbreakers: These are traditional designs that are ground into the tool’s surface. They are effective in many materials but can sometimes have limitations in how complex their shape can be.
- 3D Laser-Cut Chipbreakers: This is a more advanced manufacturing process. A high-precision laser is used to create intricate 3D topographic features on the tool face. These complex geometries can direct chips with incredible precision, making them highly effective for difficult-to-manage materials.
Industry Example: An automotive supplier machining aluminum valve bodies was struggling with continuous chip-clearing alarms on their CNC lathes, causing significant downtime. By switching from a standard flat-top PCD insert to one with a 3D laser-cut chipbreaker, they turned long, stringy chips into small, manageable “C” and “6” shapes. This change eliminated machine stoppages related to chip control and prevented chip drag marks on the finished part.
Optimize Coolant Pressure, Volume, and Direction
Coolant does more than just cool the part. In grooving, its second job is even more important: acting as a high-powered water jet to physically blast chips out of the groove. If your coolant isn’t up to the task, chips will get stuck no matter how well they are broken.
It all comes down to three factors:
- Pressure (PSI): Low-pressure flood coolant won’t cut it for deep grooves. You need high-pressure coolant (ideally 500-1,000 PSI or more) to penetrate the tight space and force the chips out against their own momentum.
- Volume (GPM): You need enough flow to continuously flush the cutting zone and carry away heat. Insufficient volume can cause the coolant to boil off, losing all effectiveness.
- Direction: This is critical. Coolant nozzles must be aimed precisely at the cutting edge. For deep grooves, through-tool coolant (where coolant is delivered through channels inside the tool itself) is the most effective solution, as it delivers a high-pressure jet exactly where it’s needed most.
| Coolant Strategy | Pressure | Chip Evacuation | Cooling Effect | Best For |
|---|---|---|---|---|
| Flood Coolant | Low (<100 PSI) | Poor | Fair | Open, shallow cuts only |
| High-Pressure External | High (500-1000 PSI) | Good | Good | Deeper grooves where through-tool isn’t an option |
| Through-Tool Coolant | Very High (>1000 PSI) | Excellent | Excellent | Deep grooves, critical applications, automation |
A quick reminder: The optimal coolant pressure and volume can differ based on the groove depth, width, and material. It’s always a good idea to consult your machine tool builder or coolant system provider to get their specific recommendations.
Employ Advanced Programming Techniques (Peck Grooving)
What do you do when the groove is very deep and narrow? Even with a great chipbreaker and perfect coolant, there’s sometimes just no physical space for the chip to escape. This is where smart programming comes in.
Instead of trying to cut the full depth of the groove in one continuous pass, you can use a technique called peck grooving.
Think of a woodpecker. It doesn’t push its beak into the wood all at once. It makes a short peck, pulls its head back to clear the wood chips, and then pecks again, going a little deeper each time. Peck grooving does the exact same thing.
- How it Works: The program commands the tool to cut a small depth (this is the “peck depth” or
Qvalue in G-code3), retract fully or partially to let coolant flush the chips out, and then plunge back in to cut the next small depth. This repeats until the final groove depth is reached. - When to Use It: A good rule of thumb is to use peck grooving whenever the groove depth is more than two to three times the width of the PCD insert.
- Setting Your Peck Depth: Don’t make the peck too deep. A safe starting point for the peck depth is 50% to 75% of the insert’s width. This ensures the chip has enough room to form and break before the tool retracts.
While pecking may add a few seconds to the cycle time, it is an invaluable strategy for preventing a $500 tool failure and a scrapped part due to packed chips. It turns an impossible-to-machine feature into a reliable and secure process.

How Can You Achieve a Flawless Sidewall Surface Finish?
Are you tired of seeing ugly lines and marks on your groove sidewalls, even after you’ve tried everything?
Achieving a flawless sidewall finish is a direct result of a stable process; it is not an independent goal. You must first completely eliminate vibration and ensure perfect chip evacuation. Once those issues are solved, you can produce a mirror-like finish by carefully managing PCD tool wear and employing a dedicated, light finishing pass with optimized parameters.
Think of surface finish as the final coat of paint on a car. You can’t get a glossy, smooth result if the underlying metal is dented (vibration) or if dust is falling on it as you paint (poor chip control). A perfect finish is the reward for getting the fundamentals right first.
Address Vibration and Chip Evacuation First
This is the most critical concept to understand: you cannot create a good surface finish on top of a bad process. Vibration and poor chip control are the two primary assassins of surface quality.
- How Vibration Ruins Finish: Vibration, or chatter, causes the tool to bounce against the workpiece at a high frequency. This leaves a distinct, wavy pattern on the sidewall of the groove. No matter what you do in a “finishing pass,” you will not be able to remove these underlying waves. It’s like trying to iron a deep crease out of a piece of paper—the mark will always remain.
- How Chip Drag Ruins Finish: When chips are not evacuated properly, they get wedged between the cutting tool and the finished wall. As the tool moves, it drags these trapped chips along the surface, creating long, deep scratches and gouges. A single trapped chip can ruin an otherwise perfect part.
Therefore, before you even attempt to diagnose a surface finish problem, you must go back and apply the solutions from the previous sections. Is your tool holder rigid? Are your speeds and feeds stable? Are your chips breaking and flowing out of the cut zone? If the answer to any of these is no, you have found your problem.
Inspect and Manage PCD Tool Wear
A PCD cutting edge is incredibly hard, but it is not invincible. Like an elite chef’s knife, its performance depends entirely on maintaining a sharp, perfect edge. When that edge becomes worn or damaged, it can no longer slice cleanly through the material.
Recognizing Harmful Wear
There are two main types of wear to look for:
- Flank Wear: This is the gradual dulling of the tool’s cutting edge from friction. As the edge rounds over, it stops shearing the metal and starts “plowing” or “burnishing” it instead. This increases heat, pressure, and leaves a smeared, inconsistent finish.
- Chipping: This is when a small piece of the PCD edge breaks off. This is far more dangerous than flank wear, as the microscopic fracture will leave a corresponding line or groove in every part you make.
The Importance of Inspection
You often cannot see critical tool wear with the naked eye.
- Method: Routinely inspect your PCD tools under magnification. A simple USB microscope connected to a laptop or a proper toolmaker’s microscope is essential for any shop doing high-precision work.
- What to Look For: A small, uniform wear land along the edge is normal and expected. However, if you see any jagged edges, bright white spots (indicating a chip), or if the wear land becomes excessively large, the tool must be replaced.
Industry Benchmark: In high-volume aluminum machining, a flank wear land might be considered excessive once it exceeds 0.15-0.20 mm (0.006″-0.008″). Beyond this point, a measurable drop in surface quality (measured by the Ra value4) is almost certain, and the risk of catastrophic tool failure increases significantly.
Refine Your Finishing Pass Strategy
Have you ever seen a carpenter build furniture using just one grade of sandpaper? Of course not. They use coarse paper to do the heavy shaping and then switch to very fine paper for that final, smooth touch. The exact same logic applies to high-precision machining.
This is known as a separate finishing pass. Instead of trying to cut the full groove in one go, you separate the job into two steps: a roughing pass and a finishing pass.
| Parameter | Roughing Pass | Finishing Pass | Purpose |
|---|---|---|---|
| Depth of Cut | Large (e.g., 2-3 mm) | Very Small (e.g., 0.1-0.2 mm) | Remove material quickly |
| Feed Rate | High | Low to Moderate | Maximize removal rate |
| Tool Condition | A workhorse tool | A pristine, sharp tool | Strength and durability |
| Main Goal | Speed and efficiency | Accuracy and quality |
- How it Works: The roughing pass does 95% of the work, removing the bulk of the material quickly. Then, you come back with a second pass—ideally with a fresh, sharp PCD grooving tool5—that removes only a tiny amount of material from the sidewalls.
- The Finishing Tool: This tool lives an easy life. Because it only removes a small amount of material (e.g., 0.1 mm or 0.004″), its edge stays sharp for a very long time, guaranteeing a consistent, beautiful finish part after part.
- Optimizing the Finishing Feed Rate: For the finishing pass, a slower feed rate will generally produce a better surface, as the tool marks (scallops) will be closer together and less visible. However, a feed rate that is too slow can cause the tool to rub instead of cut, which actually harms the finish. Finding the right balance—often through a few test cuts—is the key to perfection.
Conclusion
Ultimately, success in PCD grooving comes down to understanding that vibration, chip control, and surface finish are not separate problems—they are deeply interconnected. You cannot solve one without addressing the others. By building a foundation of maximum rigidity, you create a stable process that allows advanced chipbreakers and optimized coolant to work effectively. Only on this stable foundation can you manage tool wear and apply a refined finishing strategy to achieve a truly flawless surface. Treat the process systematically, and you will turn frustrating challenges into consistent, high-quality results.
References
- PCD is not all the same1 – A ZYDiamondTools guide explaining the key properties of Polycrystalline Diamond, including hardness, toughness, and wear resistance.
- well-designed chipbreaker2 – An in-depth guide from ZYDiamondTools on how to select and apply PCD chipbreaker inserts for better performance.
- G-code3 – A Wikipedia article explaining G-code, the most widely used computer numerical control (CNC) programming language.
- Ra value4 – A Wikipedia page detailing the concept of surface roughness and explaining parameters like Ra (arithmetic average of the roughness profile).
- PCD grooving tool5 – A ZYDiamondTools product page for CNC PCD grooving inserts, suitable for finishing passes.