-
Whatsapp: +86 13526572721
-
Email: info@zydiamondtools.com
-
Address: AUX Industrial Park, Zhengzhou City, Henan Province, China
-
Whatsapp: +86 13526572721
-
Email: info@zydiamondtools.com
-
Address: AUX Industrial Park, Zhengzhou City, Henan Province, China

2, 4, or 6 Flutes? How to Choose the Right End Mill for Your Material and Operation

When you’re standing in front of your CNC machine, how do you decide if a 2, 4, or 6+ flute end mill is the right tool for the job?
The choice depends on two primary factors: the material being cut and the operation being performed. Use fewer flutes (2-3) for soft materials and roughing operations to ensure good chip evacuation. Use more flutes (4+) for hard materials and finishing operations to achieve a better surface finish and higher tool rigidity.
What Flute Count is Best for the Material I am Cutting?
So, how do you match the number of flutes on your end mill to the specific material you’re working with?
The fundamental rule is to use fewer flutes (typically 2-3) for soft, non-ferrous materials like aluminum to ensure effective chip evacuation, and more flutes (4 or more) for hard, ferrous materials like steel to increase tool strength and achieve a better surface finish.
Choosing the correct flute count is one of the most critical decisions you’ll make before starting any milling job. The material’s properties—how soft, hard, or gummy it is—directly dictate how the tool needs to behave. Let’s break down the standard industry practices for different material groups.
For Soft Materials like Aluminum and Plastics
When machining soft materials like aluminum, brass, or plastics, the biggest challenge isn’t hardness; it’s chip control. These materials produce large, long, and often sticky chips that can easily clog the tool.
The primary goal here is maximum chip evacuation.
Think of an end mill’s flutes as deep valleys. For soft materials, you need wide, deep valleys to quickly get the large chips out of the way. If the chips can’t escape, they can melt and weld themselves to the tool, a catastrophic failure known as chip welding. This instantly ruins both the tool and the part.
- 2-Flute End Mills:1 These offer the largest possible flute valleys, providing the best chip evacuation. They are the go-to choice for aggressively cutting aluminum, especially when cutting deep slots or pockets where chips have nowhere else to go.
- 3-Flute End Mills: This is often considered the sweet spot for general-purpose aluminum machining. A 3-flute end mill offers significantly better rigidity and a smoother finish than a 2-flute tool while still providing excellent chip removal. Many machine shops that specialize in aerospace components made from 6061-T6 aluminum rely on 3-flute tools as their standard for both roughing and finishing.
| Material Group | Primary Challenge | Recommended Flute Count | Why? |
|---|---|---|---|
| Soft Materials (Aluminum, Plastics, Brass) | Large, Gummy Chips | 2 or 3 Flutes | To maximize chip evacuation and prevent clogging or chip welding. |
For General Purpose Steels and Cast Iron
Once you move to harder ferrous materials like carbon steel, alloy steel, and cast iron, the rules change. These materials produce smaller, more brittle chips that are easier to manage. Here, the priority shifts from chip evacuation to tool strength and stability.
Using a 2 or 3-flute end mill on steel can lead to chatter and excessive tool wear because the tool itself isn’t rigid enough to handle the higher cutting forces.
- 4-Flute End Mills: This is the undisputed workhorse for steel machining. With four cutting edges, the tool is much stronger because its core diameter is larger. The cutting load is distributed across more flutes, leading to a smoother cut, better surface finish, and longer tool life. For example, when milling features into a block of A36 structural steel or ductile iron, a 4-flute configuration allows for a more aggressive feed rate than a 2-flute tool, directly improving cycle time and efficiency.
The smaller, manageable chips produced by steel break away cleanly and don’t require the massive flute valleys needed for aluminum. Therefore, the trade-off for less chip space is more than compensated for by the massive gain in tool rigidity and performance.
For Hardened Steels, Titanium, and Superalloys
When you face the toughest materials—like hardened tool steels (50+ HRC), titanium, or nickel-based superalloys like Inconel—you need a specialist tool. These materials exert extreme cutting pressure and generate immense heat.
For these applications, the focus is on maximum rigidity and distributing the cutting load as much as possible.
- 5+ Flute End Mills (High Flute Count): Using end mills with 5, 6, 7, or even more flutes is standard practice. The very high flute count creates an incredibly thick and rigid tool core, which is essential to prevent the tool from chattering or snapping under intense pressure.
You might ask, “Won’t the tiny flute valleys get clogged?”
The key is that the machining strategy changes. You are no longer taking a heavy, deep cut. Instead, you’re taking lighter, faster cuts. Many flutes engage the material quickly, producing a very fine finish and spreading the wear across more cutting edges.
Industry Case Study: Medical Implants
A common application is the machining of medical implants from Ti-6Al-4V (Grade 5) titanium alloy. A manufacturer would typically use a 5 or 7-flute end mill. These high-flute tools are often used with specific strategies like High-Efficiency Milling (HEM), where the tool takes a shallow radial cut but a deep axial cut at very high feed rates. This keeps the tool constantly engaged and prevents heat buildup. Because the specific coatings and micro-geometries of these high-performance tools are critical, it’s always best to confirm the manufacturer’s detailed recommendations for the exact alloy you are machining.

Should I Use Fewer Flutes for Roughing or Finishing?
Does the type of job you’re doing—like a heavy initial cut versus a final smooth pass—change how many flutes you need?
Yes, absolutely. For roughing, where the goal is to remove a lot of material quickly, use fewer flutes (2-3) to allow for aggressive cuts and efficient chip clearing. For finishing, where a smooth surface is the priority, use more flutes (4 or more) for finer, higher-quality cuts.
Beyond the material you are cutting, the operation itself is the next critical factor in your decision. Machining is almost always a two-stage process: first you rough out the general shape, then you come back to finish the surfaces precisely. Each stage has a completely different goal, and therefore, requires a different type of tool.
The Priority for Roughing: Maximum Chip Evacuation
Roughing is the heavy-lifting phase of milling. The single objective is to remove the largest amount of material in the shortest amount of time. Efficiency and high material removal rates (MRR) are the name of the game.
To achieve this, you need to take deep, aggressive cuts. What’s the main byproduct of an aggressive cut? A massive volume of chips.
This is why low flute counts (typically 2 or 3 flutes) are ideal for roughing.
Imagine you are digging a large hole with a shovel. For the initial, hard work, you would use a big, wide spade to move large amounts of dirt quickly. You aren’t worried about making the walls perfectly smooth yet; you just need to get the dirt out of the way. That spade is your 2 or 3-flute roughing end mill. Its large, open flute valleys act like the wide bucket of the spade, ejecting a high volume of chips without getting clogged.
Industry Example: Mold Manufacturing
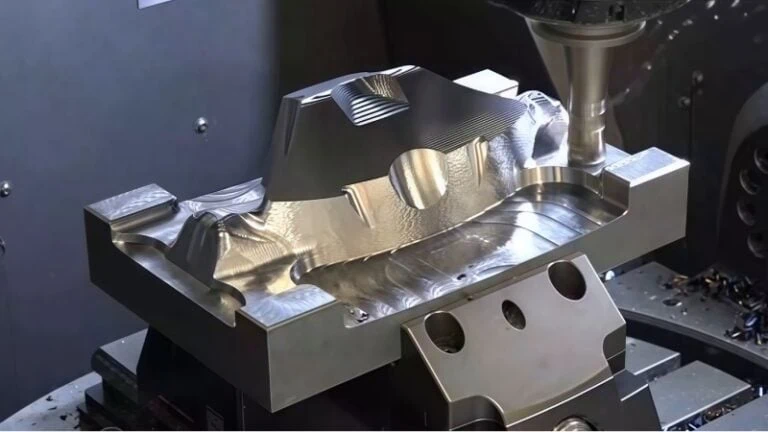
In the production of injection molds from P20 steel, the initial step is to carve out the main cavity from a solid block. Machinists often use a 3-flute roughing end mill, sometimes called a “corn cob” rougher due to its serrated edges, to hog out material. These tools are designed to withstand heavy forces and their large flute valleys are essential for clearing the high volume of chips produced, preventing recutting and tool breakage.
The Priority for Finishing: Superior Surface Quality
Finishing is the finesse phase. Here, the goal shifts entirely from speed to precision. You are only removing a tiny amount of material to bring the part to its final dimension and produce a smooth, clean surface.
For this delicate work, high flute counts (4, 5, 6, or more) are the superior choice.
With more cutting edges engaging the workpiece, each flute takes a much smaller “bite” or chip. This has two powerful effects:
- It creates a smoother surface. The marks left by the tool, known as scallops, are much smaller and closer together, resulting in a lower Surface Roughness (Ra)2 value.
- It increases stability. The cutting forces are more evenly distributed, leading to a more stable cut with less tool chatter, which is critical for achieving tight tolerances.
Returning to our digging analogy, once the hole is dug, you would switch to a smaller, flatter trowel to smooth the walls. You take off just a little dirt with each pass, but the result is a precise and clean surface. That trowel is your high-flute-count finishing end mill.
The choice between different flute counts for finishing can have a measurable impact. For instance, all other factors being equal, a 6-flute end mill can often produce a surface finish twice as good as a 2-flute end mill running at the same feed rate per tooth. While a 4-flute can certainly be used for finishing, dedicated finishers with higher flute counts are the professional’s choice for top-tier results. When a blueprint calls for a mirror-like finish or an extremely low Ra value, tools with 5 or more flutes are not just a luxury—they are a necessity.
| Operation | Primary Goal | Flute Count | Analogy |
|---|---|---|---|
| Roughing | High Material Removal | Low (2-3 Flutes) | Using a large spade to dig a hole quickly. |
| Finishing | High Surface Quality | High (4+ Flutes) | Using a small trowel to smooth the walls perfectly. |

How Does Flute Count Directly Impact a Mill’s Performance?
Beyond just a number, how does adding or subtracting flutes actually change the way an end mill behaves?
Increasing the flute count fundamentally makes the tool stronger and capable of producing a better finish, but it reduces the space available for chip evacuation. Conversely, decreasing the flute count enhances chip removal capability at the cost of tool rigidity and potential surface quality.
The flute count you choose is a constant balancing act between strength, space, and speed. These three factors are physically linked to the tool’s geometry. Understanding this trade-off is the key to moving from just following recommendations to truly understanding why a certain tool works best for your job.
Tool Strength and Rigidity (Core Diameter)
At the center of every end mill is its core—the solid central shaft of the tool. The size of this core is the single most important factor determining the tool’s strength and rigidity.
Think of the difference between a hollow pipe and a solid steel rod. The solid rod is far more resistant to bending and vibration. The same principle applies here. The relationship between flute count and core size is a critical concept:
- High Flute Count (4+ flutes): The valleys (flutes) are shallower and do not cut as deeply toward the tool’s center. This leaves more material at the core, resulting in a larger, stronger core.
- Low Flute Count (2-3 flutes): The need for massive flute valleys requires deeper cuts into the tool’s body, which are closer to the centerline. This results in a smaller, weaker core.
Why does this matter so much? A stronger, more rigid tool is less likely to experience deflection, which is the tendency for the tool to bend away from the material under cutting pressure. It also resists chatter, a harmful vibration that ruins surface finish and can destroy the tool. A 4-flute end mill, for instance, has a measurably larger core diameter than a 2-flute equivalent, making it significantly more stable when cutting hard materials like steel.
Chip Removal Rate (Flute Valley)
The flute valley is the empty channel between each cutting edge. Its only job is to provide a clear path for chips to be ejected from the cutting zone. This is the direct trade-off with the tool’s core diameter.
A larger core means there is less space available for the flute valleys.
Think of gutters on a roof in a heavy storm.
- Wide, deep gutters (low flute count) can easily handle a downpour, channeling a large volume of water away quickly. This is essential for materials like aluminum that create large, continuous chips.
- Narrow, shallow gutters (high flute count) would be quickly overwhelmed, causing water to back up. This is what happens when using a high-flute tool in the wrong application; the flute valleys clog with chips.
When chips cannot escape, a process called recutting occurs. The tool starts grinding the same chips over and over, which generates extreme heat and friction. This leads to poor surface finish, premature tool wear, and is a primary cause of tool failure. Therefore, the excellent chip removal of a 2 or 3-flute tool is not just a feature—it’s a requirement for successful roughing and soft material machining.
Achievable Feed Rate and Surface Finish
Finally, the number of flutes directly impacts your machine’s productivity and the quality of your finished part.
Feed Rate and Productivity
In machining, time is money. The speed at which you can cut material is known as the feed rate. This is calculated using a simple relationship3:
Feed Rate = Chip Load Per Tooth × Number of Flutes × RPM
This shows a powerful truth: if you can double the number of flutes while keeping the chip load (the thickness of the chip each tooth cuts) the same, you can double your feed rate. This means you can cut the part in half the time. This is why production shops favor high-flute-count tools whenever the material and operation allow; the productivity gains are enormous.
Surface Finish Quality
As we’ve discussed, more flutes are better for finishing. The reason is that the work of the cut is divided among more cutting edges. Each tooth takes a smaller, finer bite of the material.
Imagine drawing a circle with a series of straight lines. If you only use four lines, you get a square. If you use eight lines, you get an octagon. If you use a hundred tiny lines, your shape will look like a near-perfect circle. The cutting edges of an end mill work the same way, creating a surface with tiny ridges (scallops). More flutes create more “lines,” resulting in much smaller scallops and a smoother, more precise surface.
This table summarizes the core trade-offs:
| Flute Count | Core Diameter (Strength) | Flute Valley (Chip Room) | Potential Feed Rate | Typical Surface Finish |
|---|---|---|---|---|
| Low (2-3) | Smaller / Weaker | Large / Excellent | Slower | Coarser |
| High (4+) | Larger / Stronger | Small / Poor | Faster | Finer |

When Do I Need a High Flute Count (5+ Flutes)?
So when should you reach for those specialized end mills with 5, 7, or even more flutes?
You need a high flute count (5 or more) for three main scenarios: when using advanced High-Efficiency Milling (HEM) toolpaths, when cutting extremely hard or abrasive materials like titanium and composites, and when the primary goal is to achieve a superior, mirror-like surface finish.
While a 4-flute end mill is a versatile workhorse, it has its limits. High-flute-count tools are specialists, designed to solve specific problems where standard tools would fail or perform poorly. Think of them not as everyday tools, but as essential problem-solvers for the most demanding applications in modern manufacturing.
For High-Efficiency Milling (HEM) Toolpaths
High-Efficiency Milling (HEM), also known as dynamic milling, is a modern machining strategy that has revolutionized how shops remove material. It works by pairing a high-flute-count end mill with intelligent software.
Instead of taking a heavy, wide cut, HEM uses a very light width of cut but a much deeper length of cut, combined with a dramatically increased feed rate.
- Traditional Milling: Big, wide bite at a slower speed.
- High-Efficiency Milling: Many small, fast, deep bites.
Why is a high flute count (typically 5 or 7 flutes) essential for this? The entire strategy relies on maintaining a constant, light load on the tool. The high number of flutes ensures the tool is always in the cut, which prevents vibration and shock loading. This allows the machine to move at incredible speeds, clearing material much faster than traditional methods while also extending tool life because the heat is transferred into the chip, not the tool.
Analogy: Slicing a Potato
A traditional toolpath is like trying to chop a potato in half with one big, forceful push. HEM is like using a mandoline slicer. It takes many super-thin slices very quickly and with very little effort. The result is the same—the potato gets cut—but the mandoline (HEM) method is faster, smoother, and requires far less force.
For Machining Abrasive or Difficult-to-Cut Materials
Some materials fight back. These fall into two categories where high-flute-count tools excel:
- Difficult-to-Cut Materials: These are hard, gummy, and generate extreme heat, like Titanium and nickel-based superalloys (Inconel). Here, the superior strength and rigidity of a high-flute tool’s thick core are necessary to prevent the tool from breaking.
- Abrasive Materials: These materials act like sandpaper, wearing down a sharp cutting edge in seconds. This includes composites like Carbon Fiber (CFRP), G10, and some high-silicon aluminums.
For abrasive materials, the advantage of a high flute count is about distributing wear. With more cutting edges, each edge is engaged in the material for a shorter period during each revolution of the tool. This spreads the abrasive wear across 5, 7, or even 10+ flutes, dramatically increasing the tool’s usable life. Using a 4-flute tool on carbon fiber could cause it to become dull mid-cut, leading to delamination4 and a scrapped part. A specialized 8-flute diamond-coated “compression” router, however, is designed to last and produce a clean cut every time.
For Achieving a Mirror-Like Finish
Sometimes, a standard “good” finish isn’t good enough. For applications like optical components, high-end consumer electronics, and high-polish injection molds, the goal is a flawless, mirror-like surface directly from the machine.
This is where the highest flute counts—from 8 to 14 or more—come into play.
These tools are precision instruments designed for one purpose: quality. By dividing the work among so many flutes, the size of the chip each tooth takes is microscopic. The resulting scallops left on the surface are so small that they are nearly imperceptible to the naked eye.
Industry Example: Injection Mold Making
To create a perfectly clear plastic part, like a car’s headlight lens, the steel mold must have a flawless, polished surface. Any imperfection in the mold will be copied onto every plastic part. To minimize the extremely expensive and time-consuming process of hand polishing, mold makers use high-flute-count (often 8-14 flutes) carbide end mills for the final machining passes. This drastically reduces the time needed for manual polishing, which is a highly skilled and expensive labor cost. For such critical applications, machinists rely on the specifications provided by tooling suppliers, as these specialized finishers often have unique geometries and coatings designed for this exact purpose.
Conclusion
Choosing the right flute count is not about finding a single “best” tool, but about selecting the optimal tool for a specific task. By understanding the fundamental trade-offs between chip evacuation and tool rigidity, you can make informed decisions that go beyond simple charts. Whether you need the massive chip-clearing capacity of a 2-flute for aluminum, the balanced performance of a 4-flute for steel, or the precision of a 7-flute for a high-efficiency toolpath, matching the flute count to your material and operation is a critical step toward more efficient, precise, and profitable machining.
References
- 2-Flute End Mills:1 – ZYDiamondTools product page for a PCD 2-Flute Center Cutting End Mill, ideal for applications requiring maximum chip evacuation in non-ferrous materials.
- Surface Roughness (Ra)2 – A comprehensive Wikipedia article defining surface roughness and explaining the various parameters like Ra.
- calculated using a simple relationship3 – A practical online tool from ZYDiamondTools to help calculate the optimal cutting speeds and feed rates for your specific machining parameters.
- delamination4 – A ScienceDirect topic page providing a scientific overview of delamination as a failure mode in composite materials.


